Anticipation

anticipation (ænˌtɪsɪˈpeɪʃən) — n 1. the act of anticipating; expectation, premonition, or foresight – World English Dictionary

One of the greatest pleasures that large format photography gives me is the manner in which it encourages anticipation of the end result; the photograph. This feeling of anticipation is based upon a foundation of contemplation, thought and preparation. Conceiving the photograph, setting up the camera and preparing to take the photograph is a time consuming process in large format photography; with time measured in minutes, not seconds as is common with SLR type cameras.

However, anticipation is not limited to large format photographers, it’s a valuable emotion that all photographers can harness, regardless what type of camera used. It does however, require a different approach to photography than many SLR photographers are used to using. It’s an approach based upon forethought about how a scene could be rendered, and not a reaction to how it is.

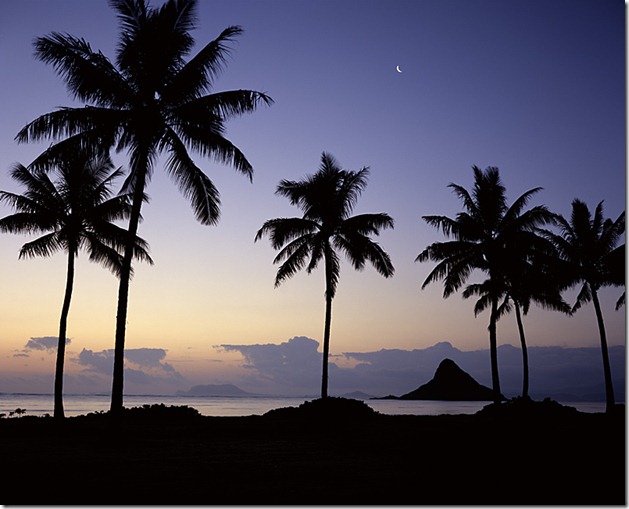
Moonrise over Chinaman’s Hat. Kualoa Regional Park, Oahu, Hawaii.

Moonrise over Chinaman’s Hat. Kualoa Regional Park, Oahu, Hawaii. Toyo 45AII Camera, Schneider Symmar-S 135mm f5.6 lens on Fuji Velvia 100F.

Neither approach is wrong, of course, but I’ve found that my finest results come when I’ve anticipated the results before taking the photograph. So, what are the steps that go into the process of anticipation?

1. Know what you want. It seems quite elemental, but many photographers go out to take photographs without any thought given to what they desire to photograph or how it fits with their interests and photographic goals. It doesn’t matter if the objective is to photograph the sunrise, or whether the outing is part of a larger, more all encompassing, project. Knowing and defining the objective – the photographer’s “vision” – is essential.

It is not a peripheral subject reserved for the photographic elite or photographers with a sociopathic bent towards navel-gazing. It is the place we begin, and the road we travel, on the way to our goal – creating compelling photographs that express something we’ve no other means of expressing but through the frame.”David duChemin – The Vision Driven Photographer.

Without a clearly defined vision, the photographer will flounder, and there can be no real anticipation of what lies ahead, for the photograph. The lack of vision will carry over into the overall body of the photographer’s work, defining it in an unflattering manner. Vision enables you to glimpse into the future, to sense its hope and power, and builds a sense of anticipation that can be fulfilled by your photography.

2. Preparation and research. Once the determination about what to photograph has been made, the next step is to prepare to take the photograph. This can be one of the more mundane parts of the anticipation process, but it’s the part where you learn what is possible for the given subject and location.

I like to begin by considering the location and the lighting that I expect while there. Some subjects work better early in the morning, while others work better in the afternoon. Additionally, knowing the type of terrain to expect you can get a sense of how long it will take to get into position, and the direction where the majority of the lighting will come from. A good topographical map or a computer program like Photographer’s Ephemeris can be quite helpful.
Read more of this post

Simplicity in Composition

“The landscape is a complex subject but understanding that something is complex doesn’t mean that one must necessarily present the subject in a complex manner”. David Ward, Landscape Beyond – A Journey into Photography. (p.33)

In landscape photography, photographers are often confronted with the need to take a complex composition, and extract a clearer and easier to understand composition from it. The difficulty lies in determining which elements enhance, and which elements distract. This simplification is the key, however, to achieving meaningful results. There are three main aspects of simplification to consider.

1. Simplify by removing unwanted clutter from the frame. Begin by looking not at the subject, but at the frame around the subject. Remove any unnecessary clutter from the composition that may lead the viewer’s eye outside the composition, or away from the subject itself.

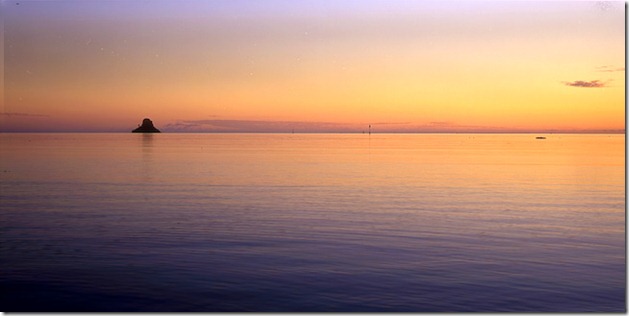
The subject, or the essential element, of the composition, may, at times, be the tiniest of details. In those cases, the composition isn’t necessarily of that element, but of the other elements of the composition that revolve around and give context to it. For example, in the following image, that tiny, essential, element was the small island named “Chinaman’s Hat.” The surrounding water served to show the environment where it is located. It provides a scene of solitude, peace and tranquility.

Chinaman’s Hat at Sunrise

Chinaman’s Hat at Sunrise. Kahaluu Bay, Oahu. Hawaii. Chamonix 45N-1 Camera, Schneider APO Symmar 210mm f5.6 lens on Fuji Velvia 50, using a Horseman 6×12 roll film back.

However, including the beach in the foreground (where I was standing to make the composition) would have served to pull the eye away from the tiny island as it woke to the rising sun, and destroyed its simplicity.

2. Simplify to concentrate the viewer’s attention on the subject. Secondly, what is it about the subject that stirs your emotions and ignites your desire to photograph it? That is the element  that the composition should emphasize.

Try “seeing” the underlying elements that caught your attention in the first place, and then exclude, or minimize, those elements that distract from your feelings toward the subject. One way to do that is to close one eye when looking at the composition. This gives a feeling for how the subject will appear in the photograph, and will help to determine what should be included or excluded. Remember, what you omit from the composition is just as important as what you include.

Read more of this post

Best Practices for the Photography Workflow Backup

In the modern world of photography, presenting photographs digitally is a necessity. This is true for me even though I am a film based photographer. In order to present photographs digitally I make use of high-resolution film scans, in the range of 325 MB each. The high resolutions scans I use are all produced by West Coast Imaging, on their Heidelberg Tango drum scanner. These scans are both expensive and time consuming to produce, so as a result, I seek to protect my investment in them as much as possible.

Almost every photographer has their own backup strategy. Their backup strategy should be based upon their individual needs and consideration. However, there are certain best practices that should be considered when defining a strategy.

Successful Backup Strategy Considerations

A successful backup strategy should take the following into consideration:

Decide what you need to back up. Start with your answer to the question “What can I afford to lose?” As photographers we are interested in our image files first, however, our general business related files are also important to the well being of the photography business.

First, separate data files from operating system files, and place them on either a separate partition or a separate drive. This will make finding, backing up, and restoring the desired files much easier. 

Secondly, set aside your installation disks for all your software and your operating system. I like to set aside the CD or DVDs they come on, as well as copy the disks to an external drive (where re-installation is much faster).

Define the backup techniques and technologies. Not every photographer has the same needs. A large studio or photography business may need an enterprise level solution, while the freelancer can get by with much cheaper solutions. Remember, the more extensive the backup, the more difficult it will be to use, and the less likely it will be carried out successfully.

Consider keeping a backup log. Keep the listing in a book or a file listing on an external drive. This can make it easier to find a specific file if you happen to overwrite or destroy it in some manner. A general listing is sufficient.

Backups should be automatic. Whatever technique or technology you select, it should be automatic; you shouldn’t need to be present to initiate a backup.

Read more of this post

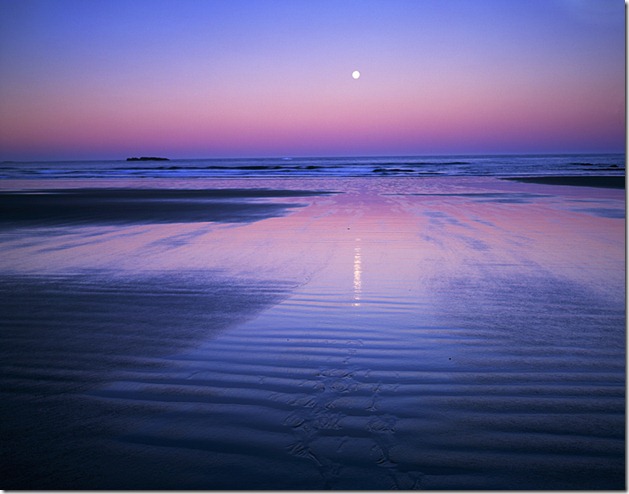
Oregon Moonrise

A few years ago, on a trip to photograph the Oregon coast with Per Volquartz and a small group of large format  photographers, we camped for the night not far from Devil’s Punchbowl Natural Area. Being the only photographer in the group specializing exclusively in color, I got up before sunrise to photograph from the nearby park.

Being on the US West Coast, with a small mountain range to the east, I knew that conditions weren’t ideal for a sunrise photograph. However, when I arrived at the park, I found the tidal flats were empty, the tide out, with a full moon in the sky. I knew that I couldn’t ask for better circumstances.

OR1015AA

Oregon Moonrise. Devils Punch Bowl State Natural Area, Oregon. Toyo 45AII camera, Nikkor SW 90mm f8 lens on Fuji Velvia 50.

I’ve always found the Nikkor 90mm SW to be a difficult lens to work with, the small F8 aperture makes focusing on the ground glass difficult. As a result, while the foreground is sharp, the horizon isn’t as sharp as I would like. Since this time, I’ve upgraded to a Schneider Super-Symmar XL 80mm f4.5, which is an absolutely, beautiful lens to work with.

Later during this trip, we were able to meet with noted landscape photographer Christopher Burkett, in his home/workshop in Portland.

Read more of this post

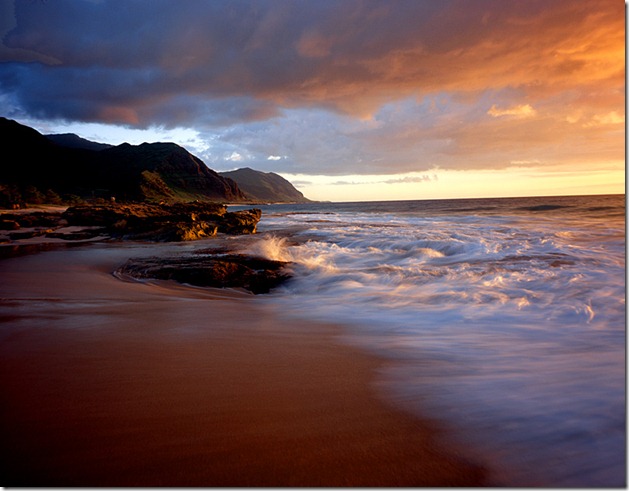
Angry Sea at Makua Beach

Many photographers get wrapped up in the technical aspects of photography. But, it’s not about the number of pixels or the toe and shoulder curve on the tonal range of a film base, it’s about vision. It’s vision that transforms a mundane scene to one that is memorable; one that sticks in our minds.

One Sunday afternoon I drove to Makua Beach on the Waianae coast of the island of Oahu. I had vision of a photograph taken at particular rock formation near the end of the beach. In the late afternoon, during the winter months, it isn’t unusual to get a bit of overcast skies, with a smattering of rain. So, I knew from experience that it was possible to get a bit of cloudiness and a sun lit sky, close to sunset.

The problem was, the rock was teeming with fishermen and children playing in the surf. With a slight sprinkle, everyone soon decided it was time to move on, and I was left with the location to myself. I hurriedly waded out into the sand, camera mounted on the tripod, Nikon F5 slung around my shoulder to use as a light meter.

HI5115AA

Angry Sea. Toyo 45AII Camera, Schneider Symmar-S 135mm f5/6 lens, on Fuji Velvia 50.

Watching the movement of the sea, I timed my exposure for a point in time when the surf was receding from the shore, which I knew would leave the sea wet. I also knew that a slow shutter speed would leave “fingers” of water.

Since, I’ve taken this photograph, I’ve learned a bit more about how others perceive a photograph. The photograph that appears above isn’t my favorite of the session, but it’s the one most popular with others. My favorite was taken just after the first, from a different point of view.

Read more of this post

Field Tips: Being Aware of Your Surroundings

They say that Australia is home to some of the deadliest snakes in the world. But, in all my trips there, I’ve never seriously considered the possibility of encountering one in the wild. I guess that after living in in Hawaii for several years, I’ve become somewhat complacent about the possibility. After all, there are no snakes in Hawaii. 

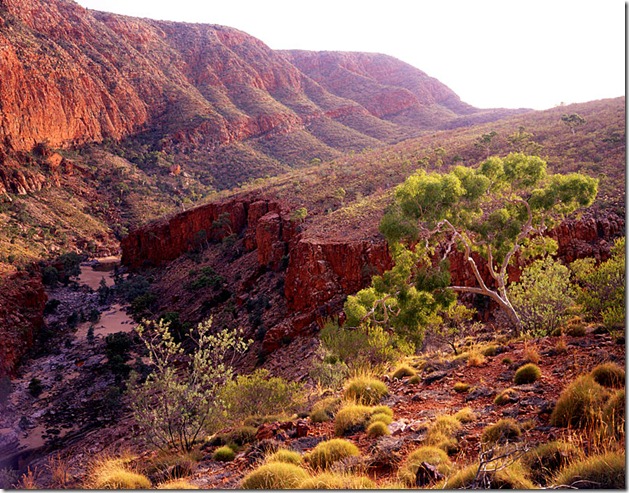
A few years ago on a visit Western MacDonnell National Park in Australia’s Northern Territory,  a situation arose that made me aware of the need to consider such possibilities. I’ve visited Australia on numerous occasions, and have photographed in the Outback several times, but I’ve never actually seen a snake in the wild. One morning at Ormiston Gorge, I arose well before dawn, to make the 2 km walk up the White Gum Lookout Walk. With the help of a full moon, and excellent night vision, I was able to make the walk in the dark. I arrived at the lookout well before sunrise, spent an hour or so photographing, then made my way back to camp for breakfast. A nice morning shoot.

Sunrise, Ormiston Gorge

Sunrise, Ormiston Gorge. Toyo 45AII, Schneider Symmar-S 135mm f5.6 lens on Fuji Velvia 50.

However, that evening a situation at the campground that reminded me of the need to be more careful, and how that pre-dawn walk was probably not the wisest decision I had made.

Read more of this post

Twitter as a Tool for Photographers

I’ve been on Twitter for about a year now, and I’ve found it an absolutely wonderful tool to keep my finger on what is going on in photography, to learn about other photographers, and just to have a bit of fun. When I tell people about Twitter, often they think Twitter is about people detailing their coffee drinking, lunch habits or worse. Instead, by controlling who you “follow” it’s possible to have a good experience.

Through the reach of Twitter, I was recently able to meet up with an Australian photographer, Ilya Genkin (@igenkin) on a recent photo shoot in the Blue Mountains of Australia. I had a great afternoon picking his brains over a cup of coffee about the photography scene in Australia, as well as information and tips on photographing in the Blue Mountains. His friendship and time was well appreciated, and make that portion of my trip even more memorable and enjoyable.

Choose Who to Follow

I make a general practice to only follow those photographers who actively tweet about photographic subjects, either their latest work, or links to blog sites about photography, links about equipment, or any other link that is photographically oriented. Photographers who tweet political topics, or some other controversial topic generally find themselves “un-followed” very quickly. Keep in mind, photographers are human and will occasionally tweet about other subjects, even sensitive subjects; what I’m referring to is the general tone of their tweets. By controlling who to follow, I can more easily keep my Twitter timeline pared down to productive subjects.

When following another photographer, be sure to check who they follow. This will often lead to new photographers to follow.

Make Sure to Participate

The secret behind Twitter is sharing what other photographers are tweeting about. Make sure to retweet liberally, whenever they post a photograph, blog entry or web article that is of interest. Likewise, make sure to tweet about your photographic efforts that others may find of interest.

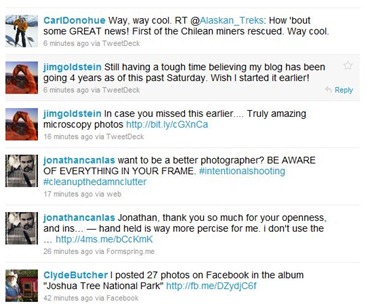
SampleTwitterTimeline

Pay attention to those who follow you. While you don’t need to be obligated to return follow everyone who follows you, many people don’t like to follow people who don’t return follow them in return. The more you followed, and are followed, the more your tweets will be of benefit towards others.

Like most people you will have people you follow who aren’t photographers. I’ve found that by creating a list of photographer, I can quickly get a timeline that shows tweets from only those I have identified as photographers (see figure).


Read more of this post

Surfing Pleasures

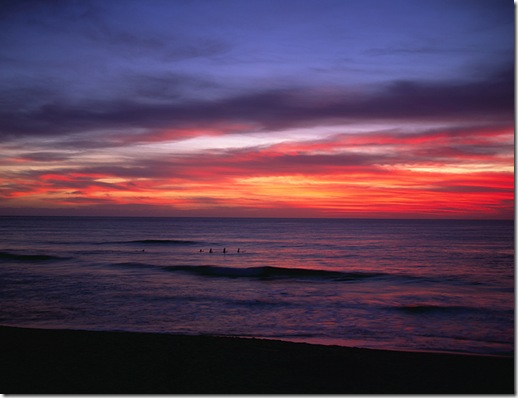
One Sunday afternoon, I had traveled to one of my favorite locations on the island of Oahu, Hawaii; Kaena Point State Park. Unfortunately, the light wasn’t working for me that afternoon (or I just wasn’t perceptive enough to see it), so I left early. Generally, I never leave until at least 30 minutes after sunset, but this day I left about 45 minutes before. As I was leaving the seaside town of Wai’anae, I saw that the sky was starting to turn a blazing red. Finally, the color was so incredible that I pulled into the first park that I came across.

HI5243AA

Hurriedly parking the car, I jumped out, grabbed my 4×5, and proceeded to setup for a shot. Not having time to properly meter, I used my Nikon F5 to take a quick meter reading. As I was setting up the camera, and metering the scene, I noticed several surfers in the water, waiting for a wave. Finally, they lined up in the water, and I snapped the shutter. While it seemed like I waited a long time for the different elements to come together, in reality it was perhaps no more than 5 or 10 seconds that I waited.

I learned one lesson out of this incident; stay put wherever I am, regardless how bad the light seems; it may change quickly. Fortunately, in this instance the situation worked out for the best.

Who says you can’t take surf photos with a large format field camera, and a wide angle lens?

Photo Details: Kahe Point Beach Park (Electric Beach), Oahu, Hawaii. Toyo 45AII camera, Schneider Symmar-S 135mm f5.6 lens, on Fuji Velvia 50. No filters used.